| Lesson Three: Microsoft Word Basic Features
This lesson covers typing, the Backspace key, the Delete key, inserting text, bolding, underlining, and italicizing. To begin this lesson, open Microsoft Word.
Typing and Using the Backspace Key
The exercises that follow will teach you how to enter and delete text. To enter text, simply type just as you would if you were using a typewriter. To capitalize, hold down the Shift key while typing the letter. Use the Backspace key to delete text. You do not need to press Enter to start a new line -- Microsoft Word automatically wraps at the end of the line. Press Enter the start a new paragraph.
Exercise 1
- Type the following sentence:
Joe has a very large house.
- Now delete the word "house." Using either the arrow keys or the mouse, place the cursor between the period and the "e" in the word "house."
- Press the Backspace key until the word "house" is deleted.
- Type boat. The sentence should now read:
"Joe has a very large boat."
The Delete Key
You can also delete text by using the Delete key. First, highlight the text you wish to delete; then press the Delete key.
Exercise 2
Delete the word "very" from the sentence you just typed.
- Highlight the word "very."
- Place the cursor before the "v" in the word "very" and press the F8 key. Then press the right arrow key until the word "very" is highlighted.
- Press the Delete key. The sentence should now read:
"Joe has a large boat."
Inserting Text
You can insert text. To insert text, you must be in the Insert mode. To check to see whether you are in the Insert mode, look at the Status bar, located at the very bottom of the screen. Look at the right side of the Status bar. If the letters "OVR" are gray, you are in the Insert mode. If the letters "OVR" are black, you are in the Overtype mode.
 To change to the Insert mode:
- Double click on the letters "OVR."
- The letters "OVR" should now be gray.
Alternate Method -- Setting Options by Using the Menu
- Go to the Menu bar. Click on Tools.
- Highlight Options at the bottom of on the drop-down menu. Press Enter.
- Click on the Edit tab.
- The Overtype Mode box should be blank. If the box is blank, click on OK.
- If the Overtype Mode box is not blank, click on the box to remove the checkmark. Then click on OK.
Alternate Method -- Setting Options by Using Keys
- Press Alt-t, o.
- Click on Edit.
- Press Alt-o (toggles between overtype and insert).
- Press Enter.
Exercise 3
Make sure the letters "OVR" are gray before proceeding. You are going to insert the word "blue" between the words "large" and "boat."
- Place the cursor between the words "large" and "boat."
- Type the word blue.
- The sentence should now read:
"Joe has a large blue boat."
Overtype
You can type over the current text (replace the current text with new text). However, you must be in the Overtype mode. Do the following to change to the Overtype mode.
- Double-click on "OVR" on the Status bar.
- The letters "OVR" should now be black.
Make sure the letters "OVR" are black before proceeding to the following exercise.
Exercise 4
Change the word "blue" to "gray."
- Place the cursor before the letter "b" in "blue."
- Type the word gray.
- The sentence should now read:
"Joe has a large gray boat."
Bold, Underline, and Italicize
You can bold, underline, or italicize when using Word. You also can combine these features -- in other words -- you can bold, underline, and italicize a single piece of text.
In the exercise that follows, you will learn three different methods for bolding, italicizing, or underlining when using Word. You will learn to bold, italicize, or underline by using the menu, an icon, or the keys.
Exercise 5
Type the following exactly as shown. Remember, pressing the Enter key starts a new paragraph. Press the Enter key at the end of each of the following lines to start a new paragraph.
Menu: Bold Italicize Underline these words All three Regular
Icon: Bold Italicize Underline these words All three Regular
Keys: Bold Italicize Underline these words All three Regular
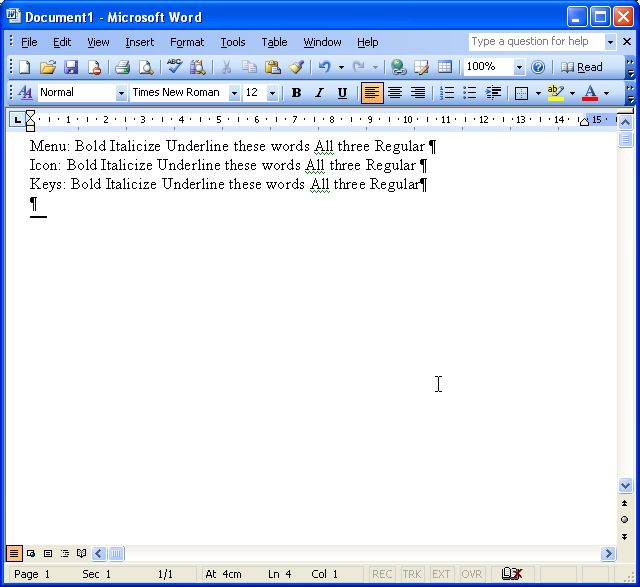
Your screen should look similar to the one shown above.
Bold - Using the Menu
- On the line that begins with Menu, first highlight the word Bold. To do so, place the cursor before the letter "B" in "Bold." Press the F8 key; then press the right arrow key until the entire word is highlighted.
- Click on Format.
- Highlight Font. Press Enter.
- Click on Bold in the Font Style box.
Note: You can see the effect of your selection in the Preview window. To turn off the bold, click on Regular.
- Click on OK to close the dialog box.
- Click anywhere in the text area to remove the highlighting.
Alternate Method -- Bold by Using an Icon
- On the line that begins with "Icon," first highlight the word "Bold." To do so, place the cursor before the letter "B" in "Bold." Press the F8 key; then press the right arrow key until the entire word is highlighted.
- Click on the Bold icon
 on the toolbar. on the toolbar.
Note: To turn off bold, highlight the text and press the Bold icon.
- Click anywhere in the Text area to remove the highlighting.
Alternate Method -- Bold by Using the Keys
- On the line that begins with "Keys," first highlight the word "Bold." To do so, place the cursor before the letter "B" in "Bold." Press the F8 key; then, press the right arrow key until the entire word is highlighted.
- Press Ctrl-b (hold down the Ctrl key while pressing b).
Note: To turn off Bold, press Ctrl-b again. You can also remove formatting by pressing Ctrl-spacebar.
- Click anywhere in the Text area to remove the highlighting.
Italicize - Using the Menu
- On the line that begins with "Menu," first highlight the word "Italicize." To do so, place the cursor before the letter "I" in "Italicize." Press the F8 key; then press the right arrow key until the entire word is highlighted.
- Click on Format.
- Highlight Font. Press Enter.
- Click on Italic in the Font Style box.
Note: You can see the effect of your selection in the Preview window. To turn off the italics, click on Regular.
- Click on OK to close the dialog box.
- Click anywhere in the Text area to remove the highlighting.
Alternate Method -- Italicize by Using an Icon
- On the line that begins with "Icon," first highlight the word "Italicize." To do so, place the cursor before the letter "I" in "Italicize." Press the F8 key; then press the right arrow key until the entire word is highlighted.
- Click on the Italic icon
 on the toolbar. on the toolbar.
Note: To turn off italics, highlight the text and press the Italic icon.
- Click anywhere in the Text area to remove the highlighting.
Alternate Method -- Italicize Using Keys
- On the line that begins with "Keys," highlight the word "Italicize." Place the cursor before the letter "I" in "Italicize." Press the F8 key; then, press the right arrow key until the entire word is highlighted.
- Press Ctrl-i (hold down the Ctrl key while pressing i).
Note: To toggle Italic off, press Ctrl-i again. You can also remove formatting by pressing Ctrl-spacebar.
- Click anywhere in the Text area to remove the highlighting.
Underline - Using the Menu
You can underline when using Word. The following types of underlines are available if you use the menu:
The following illustrates underlining using the menu:
- On the line that begins with "Menu," first highlight the words "Underline these words." To do so, place the cursor before the letter "U" in "Underline." Press the F8 key; then press the right arrow key until all the words are highlighted.
- Click on Format.
- Highlight Font.
- Press Enter.
- In the Underline box, click to open the pull-down menu. Click on the type of underline you wish to use.
Note: To remove an underline, select None from the pull-down menu.
- Click on OK to close the dialog box.
- Click anywhere in the Text area to remove the highlighting.
Alternate Method -- Underline by Using the Icon
- On the line that begins with "Icon," first highlight the words "Underline these words." To do so, place the cursor before the letter "U" in "Underline." Press the F8 key; then press the right arrow key until all the words are highlighted.
- Click on the Underline icon
 on the toolbar. You will get a single underline. on the toolbar. You will get a single underline.
Note: To turn off underlining, press the Underline icon again.
- Click anywhere in the Text area to remove the highlighting.
Alternate Method -- Underline by Using the Keys
- On the line that begins with "Keys," first highlight the words "Underline these words." To do so, place the cursor before the letter "U" in "Underline." Press the F8 key; then, press the right arrow key until all the words are highlighted.
- Press Ctrl-u (hold down the Ctrl key while pressing u). You will get a single underline.
Note: To turn off underlining, press Ctrl-u again.
- Click anywhere in the Text area to remove the highlighting.
All Three - Using the Menu
- On the line that begins with "Menu," first highlight the words "All three." To do so, place the cursor before the letter "A" in "All." Press the F8 key; then press the right arrow key until all the words are highlighted.
- Click on Format.
- Highlight Font. Press Enter.
- In the Font Style box, click on Bold Italic.
Note: You can see the effect of your selection in the preview window. To turn off the Bold Italic, click on Regular.
In the Underline box, click to open the pull-down menu. Click on the type of underline you want to use.
Note: To remove an underline, select None from the pull-down menu.
- Click on OK to close the dialog box.
- Click anywhere in the Text area to remove the highlighting.
Alternate Method -- All Three by Using Icons
- On the line that begins with "Icon," first highlight the words "All three." To do so, place the cursor before the letter "A" in "All." Press the F8 key; then press the right arrow key until all the words are highlighted.
- Click on the Bold icon on the toolbar.
- Click on the Italic icon on the toolbar.
- Click on the Underline icon on the toolbar.
- Click anywhere in the Text area to remove the highlighting.
Alternate Method -- All Three by Using the Keys
- On the line that begins with "Keys," first highlight the words "All three." To do so, place the cursor before the letter "A" in "All." Press the F8 key; then, press the right arrow key until all the words are highlighted.
- Press Ctrl-b (bold).
- Press Ctrl-i (italicize).
- Press Ctrl-u (underline).
Note: You can remove formatting by highlighting the text and pressing Ctrl-spacebar.
- Click anywhere in the Text area to remove the highlighting.
Save File
You must save your files if you wish to recall them later. Before you can save, you must give your file a name. To save your file and close Word, follow the instructions below:
- Click on File.
- Highlight Save As. Press Enter.
- Specify the correct folder in the Save In box.
- Name your file by typing lesson3.doc in the File Name box.
- Click on Save.
- Click on File.
- Highlight Exit. Press Enter.
Demonstrative and Interactive Lessons:
Bold, Underline, and Italicize - Demonstrative Lesson
Bold, Underline, and Italicize - Interactive Lesson
|